If you’re searching for a few methods on how to steam your face, you’ve come to the right place.
And I don’t say that just because I’m writing this post. But because I have tried these DIY methods that I’m going to talk about.
There are 3 ways to steam your face at home:
- Using a facial steamer
- Over a bowl of hot water (DIY)
- With hot towels (DIY)
Once you’re done reading this post, you’ll know how to steam your face in the most convenient way for you.
Contents
How to Steam Your Face Using a Facial Steamer
Let’s start with the best and most convenient method.
Using a facial steamer to steam your face and open your pores is the easiest way. It doesn’t take a lot of effort from your part.
Even more,
A facial steamer if the perfect way for creating an amazing at-home spa experience. There are plenty of affordable even cheap units to pick from so that’s easy, too.
Besides picking out the best facial steamer, you just need to follow a few steps and you’re ready to steam your face in the comfort of your home.
One of the best facial steamers is the OKACHI GLIYA NanoSteamer.
This is not a cheap steamer but its quality is quite good and it might be worth it if you are looking for a good facial steamer that’s worthy of your money.
The thing about the OKACHI GLIYA NanoSteamer is that the quality of its steam is one of the best.
Given that it has an 80ml BPA-free water tank and the steamer will turn off automatically when the water runs off.
This is a nanosteamer that promises that the steam produced by it is 10 times more powerful than the one produced by a normal steamer. There’s no way of measuring that so, we will have to take that statement at face value.
The steam will be generated in 30 seconds, this steamer works fast and it’s easy to operate.
You will get 15 minutes of continuous steam since it’s more than enough. The average time for an at-home steaming session is 10 minutes but some might feel that their skin needs a bit more time.
It promises to help with frequent skin problems: blackheads, dry skin, irritated skin, and dull skin.
The design definitely stands out among other steamers in a good way and it even includes a mirror on the lid.
It’s recommended that you only use purified/distilled water and no essential oils.
If this one is too expensive for your budget, check out the KingdomCares Hot Mist Facial Steamer, it’s one of the cheapest steamers but it will deliver a powerful steam.
Step 1: Prepare your steamer
It all starts simple enough and it goes on the same way.
All you need to do is to place your unit on a flat surface near a power outlet and grab a chair.
Step 2: Prepare your skin
You should cleanse your face before placing it in the path of the mist.
You can also exfoliate, either before or after the steaming, or both if your skin is not the really sensitive type, like mine is.
Using a chemical exfoliator is the best method for all skin types since chemical exfoliators penetrate deeply into the skin while facial scrubs only remove the dead skin cells at the surface of the skin.
If you’re using a facial chemical exfoliator, use it only after you’re done steaming the skin since most of them are left on the face until morning.
Step 3: Fill in the water tank
Each unit comes with a water tank.
The size of the water tank indicates how many minutes of steam you will get.
On average, 10 minutes of steam should be plenty. A 70 ml tank can give you that.
You should use just purified/distilled water.
Step 4: Plug in the steamer
Once the unit is on a flat surface and the water is in the tank,
There’s nothing left to do than to plug it in into a power outlet and turn it on.
Depending on the machine,
A continuous mist will come out in 30 seconds or a minute.
Step 5: Take your place
You should place your face at least 7-8 inches (20cm) from the unit in order to avoid any harm to your skin.
For the exact distance and much more info, read the user manual that comes with your unit.
Step 6: Relax and enjoy
Let the mist open your pores.
You will start feeling the results in no time.
From time to time, use a clean dry towel to blot your face.
If you want to trap the mist more efficiently, put a dry towel over your head.
Step 7: The wrap up
When there is no more water left, the steamer shuts down automatically.
If you have a unit with a big water tank (like 200 ml that offers 30 min of mist) you can use the rest of the time left to humidify your room.
After that,
Let the unit cool down for 10 minutes. Wipe if before storing.
Step 8: You’re all done with your facial steamer but not with your face
Now comes the part where you take advantage of those open pores.
- you can exfoliate or cleanse your skin
- or use a clay mask to remove toxin, the Aztec India clay is my favorite because it both heals the skin and it dissolves the dead skin cells
- then splash your skin with cold water to close the pores
- after, use your favorite moisturize, moisturizing mask, serum or acne treatments – due to the open pores their effectiveness will be highly improved
And that’s it, I told you that it was an easy method on how to steam your face.
How to Steam Your Face with Hot Towels
When thinking about this method, there’s actually a scene that comes to mind.
A guy sitting in a chair with a towel wrapped around his face before getting shaved.
It’s usually used for that because it softens the hairs.
It’s true that this method opens up the pores but not as effectively as a mist that runs into your skin for 10 minutes.
It’s just not as effective.
Plus,
You need really clean towels without any bacteria every single time. It’s too complicated for me.
How do you make a hot face towel?
Simple:
- run the towel under running water
- wring out the excess
- place it in a bowl and microwave it for 30 seconds
- or boil the water and place the towel in there but check the temperature of the towel before putting it on your sensitive facial skin
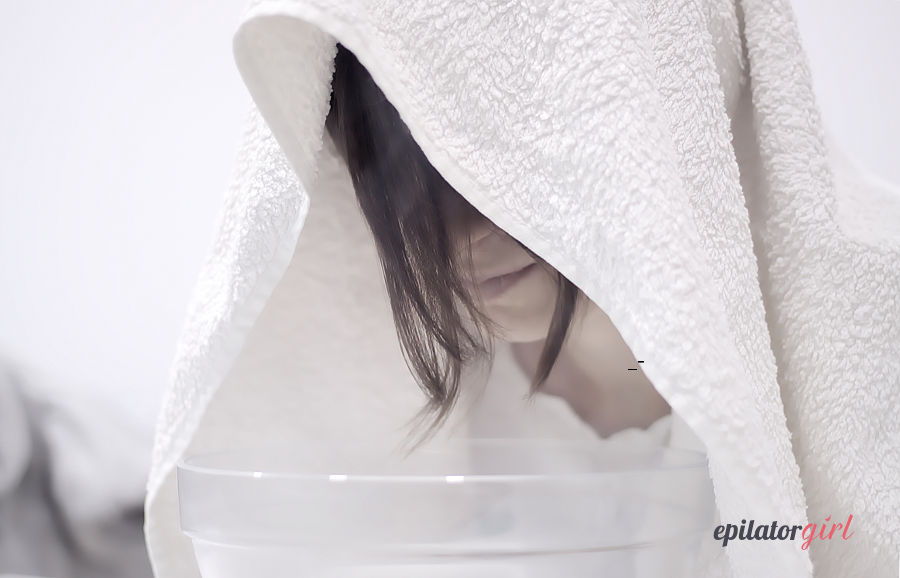
How to Steam Your Face: DIY (bowl of hot water)
Last but not least,
There’s one more method that I have to talk about when it comes to how to steam your face.
This is the traditional way.
No fancy facial steamer is needed but, for me, it’s more than welcome.
It’s the method used by our mothers and grandmothers.
1. Boil a pot of water.
2. While the water boils, prepare your face – exfoliate/cleanse.
3. Pour the boiling water into a bowl.
4. You can add essential oils, too.
5. Place a towel over your head to trap the steam and stand over the bowl. Don’t stand too closely so you don’t harm your skin.
6. What comes next is the step 8 from how to steam your face using a facial steamer, you’ll find it above. It’s the part where you take care of your face, where you complete your at-home spa experience.
Is it good to steam your face?
Given that I support that including by writing this post on how to steam your face, I’d say that it’s very good to steam your face.
Steaming:
- improves blood circulation
- it helps with sinus congestion
- it opens up pores for easier blackhead and pimples extraction without scaring the tissue
- it improves the absorption of creams or oils or serums
- doesn’t cure acne but it helps clearing the skin step by step
- is good no matter what skin type you have
However,
Those suffering from skin conditions should consult a dermatologist and ask for a professional opinion.
How often should you steam your face?
Start with once a week.
If it’s too much then once every two weeks.
My opinion is that once a week is more than enough.
What essential oils are good for steaming your face
Many facial steamers don’t advise using essential oils.
Only purified/distilled water is allowed to maintain the unit running for a very long time.
If you use the old-fashioned head over a bowl of boiling water, you can add essential oils to the water before steaming.
- tea tree oil for its antibacterial properties, those who have breakouts are all too familiar with it, although my skin doesn’t handle it very well because it’s quite sensitive and dry
- eucalyptus for those who want to improve their breathing problems
- lavender, which helps with insomnia
- peppermint for headaches
- chamomile because it soothes irritated skin
And the list is endless.
There are many essential oils with many properties, you just need to find the right one for your problem.
Is steaming good for dry skin?
Yes, it is.
Dry skin won’t start to peel if you steam your face because you will take care of it after the steaming is done.
You just need to moisturize immediately after and the moisturizer will be easily and more deeply absorbed by the skin after your steaming session.
What do you do after you steam your face?
When talking about how to steam your face, one of the most important aspects is what to do after.
Steaming opens up pores and you need to take advantage of that.
I definitely recommend using a clay mask, like the Aztec Indian clay. It cleanses the skin and eliminates toxins at a whole new level.
Then you should cleanse or gently exfoliate, depending which one works best on your skin type.
Splash cold water onto your face and get down to moisturizing.
At this point, you can also apply acne treatments. And then a moisturizer to seal all the products in.
All these products will be absorbed by the skin more deeply.
So,
What do you think?
Would you choose a facial steamer to do the work for you in the best way possible or are you going to stick with the more traditional method on how to steam your face?
")

